How To Use AI Room Design From A Photo: A Step-By-Step Guide
A step-by-step guide to AI room design from a photo: take a usable picture, pick a style, lock what must stay, and check the result before you buy.
 RoomMaker AI Team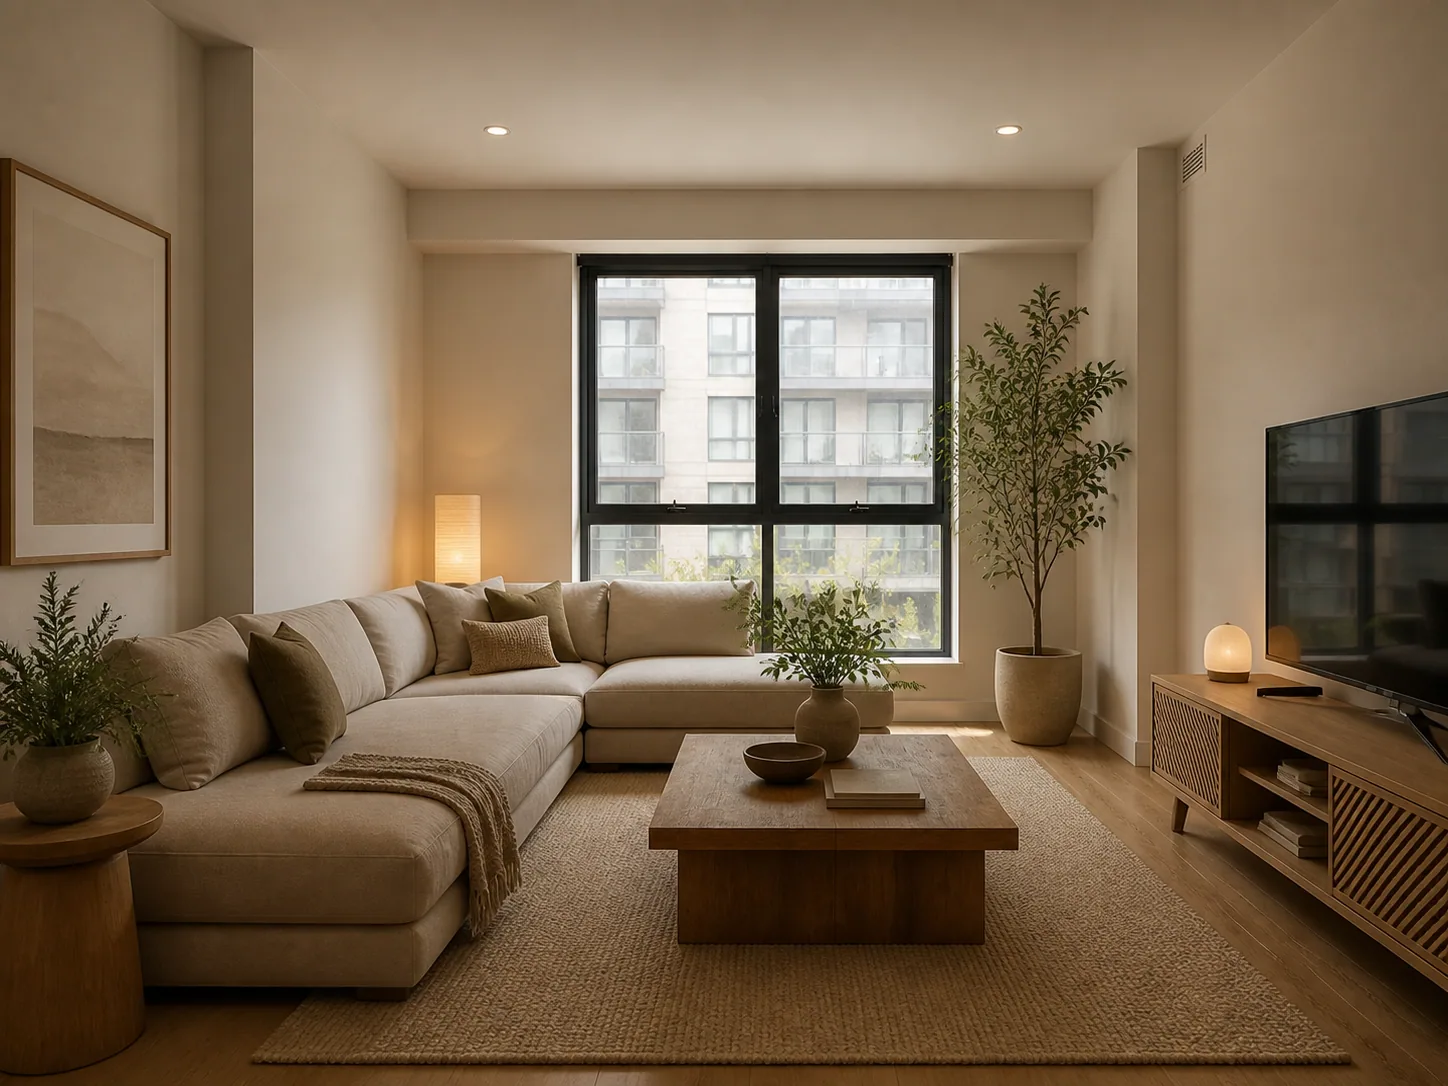
AI room design is good at one job: showing you a direction before you pay for it. You upload a photo of the room you have, say what you want, and get back a picture of the same room with different furniture, colours, and lighting.
This guide explains how to use AI to design a room so that the result is something you can act on. The steps use the RoomMaker AI room designer as the example, but the same habits work with any tool that starts from a photo.
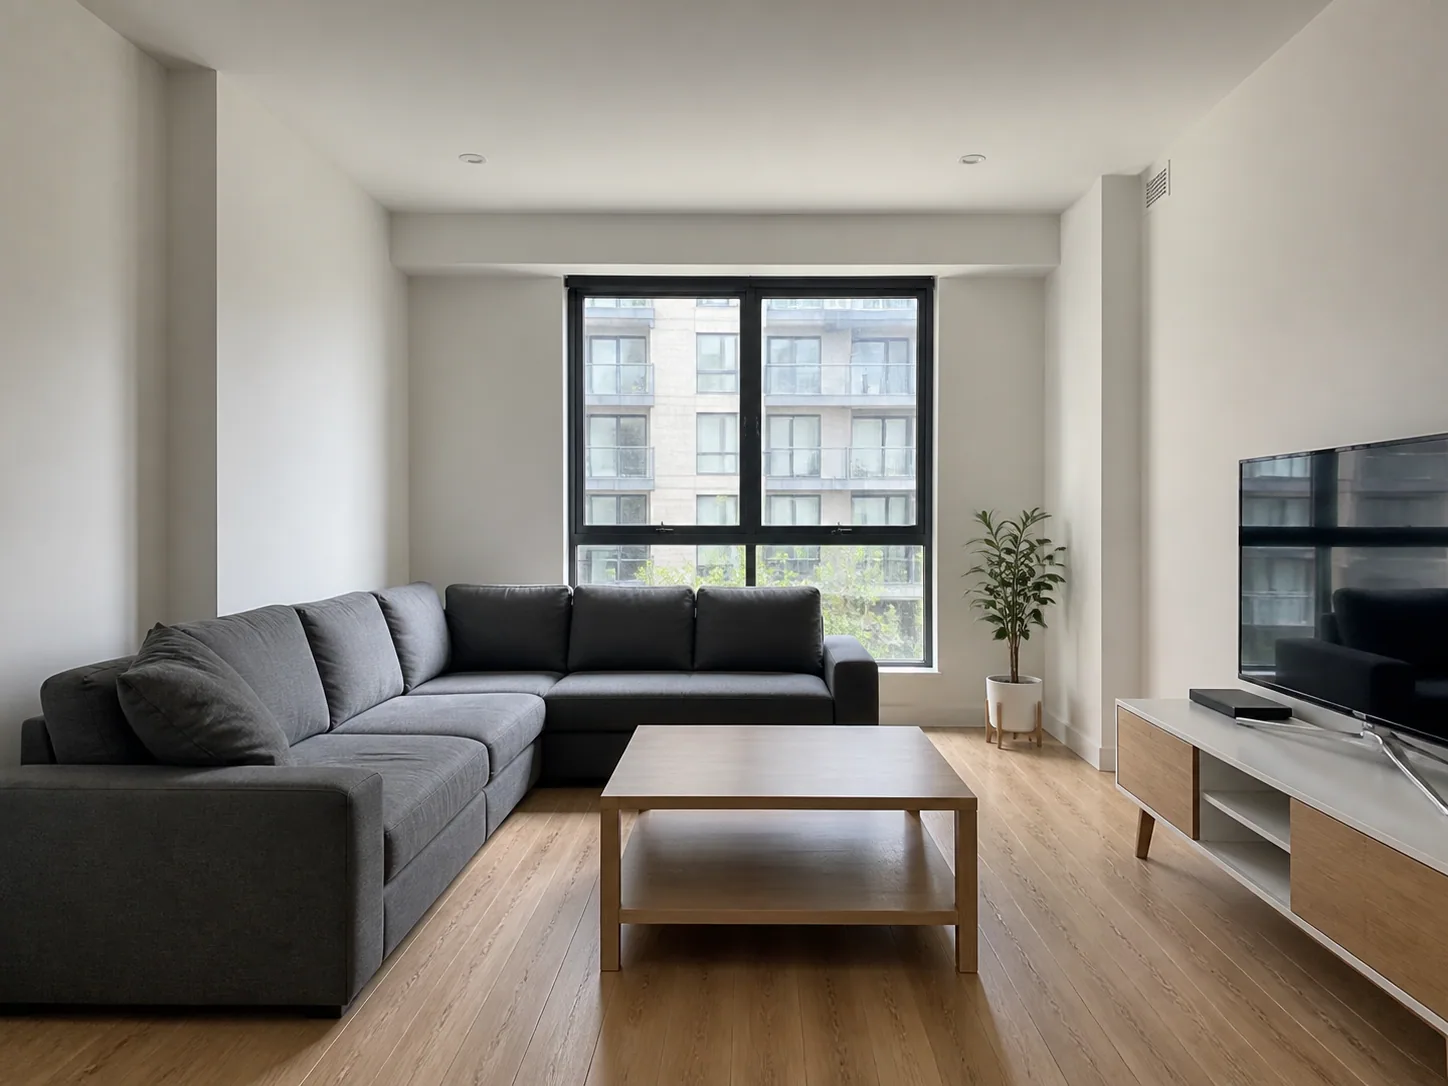 BeforeAfter
What photo works best for AI room design from a photo
The photo decides more of the result than the prompt does. The AI can only keep what it can see, and it guesses at anything that is cropped, dark, or hidden.
A photo that works well usually looks like this:
- Taken from a corner or doorway. You want the floor, at least two walls, and part of the ceiling in the frame, so the shape of the room is clear.
- Level and at chest height. Tilted photos make walls lean, and the redesign will lean with them.
- Shot in daylight. Open the curtains and turn the lights on. Avoid pointing the camera straight at a bright window, which turns the rest of the room dark.
- Reasonably tidy. Laundry, cables, and bags on the floor may be redrawn as furniture or decor. Move them out of the frame first.
- The original file. Screenshots and heavily filtered images lose detail. RoomMaker AI accepts image files up to 18MB.
Avoid panoramas and ultra-wide shots. They stretch the edges of the room, and the furniture in the result will be stretched too.
Choose a room type and one clear style
Start by telling the tool what the room is for. A living room, a home office, and a nursery need different furniture even when the walls are identical, and the room type is how the AI knows which one you mean.
Then pick one style. RoomMaker AI lists options such as Japandi, Scandinavian, Mid-century Modern, Industrial, Coastal, and Farmhouse. Two things make the choice easier:
- Match the style to what you are keeping. If the oak floor and black window frames are staying, choose a style that suits them rather than one that fights them.
- Compare a few contrasting styles first. Three different directions teach you more than ten variations of the same one. Narrow down once you know which direction you like.
If you are not sure what a style name means, run it once on your own room. Seeing it on your walls is quicker than reading a definition.
Decide what stays fixed: windows, doors, and layout
This is the step most people skip, and it is the reason many AI images look nice but cannot be built.
In a real room, most things do not move. Windows, doors, ceiling height, radiators, built-in cupboards, and the footprint of the room are fixed unless you are planning construction work. A design that quietly moves a window is a picture of a different room.
In the AI interior design tool for a full room redesign, you can add constraints alongside the style, including:
- Keep layout
- Keep windows
- No structural changes
- Rental friendly
Turn on the ones that match your situation before you generate anything. If you rent, "Rental friendly" and "No structural changes" keep the result closer to changes you are allowed to make, such as furniture, rugs, lamps, and wall art.
Write a prompt with constraints
The style menu sets the general look. The text box is where you say what you actually need. A useful prompt has three parts: what to change, what to keep, and any practical limits.
Here is an example for a living room:
Redesign this living room in a warm Japandi style. Keep the window, the wood floor, and the TV wall where they are. Replace the grey sectional with a lighter sofa of about the same size. Add a rug and one floor lamp. No new walls and no built-in shelving.
A few habits make prompts more reliable:
- Name what stays. "Keep the window and the floor" works better than hoping the AI leaves them alone.
- Describe size in relative terms. The AI does not measure your room. "A sofa about the same size as the current one" is clearer than a number.
- Ask for one thing per run. If you want to compare a light scheme and a dark one, generate them separately.
- State the limits. Mention pets, children, a small budget, or the fact that you cannot paint. Limits steer the result toward options you can use.
Read the result critically
When the image arrives, compare it with your original before you decide whether you like it. Look for these things in order:
- Architecture. Count the windows and doors. Check that they are the same size and in the same place.
- Scale. Compare furniture with something fixed, such as the door height or the window width. A sofa that fills the picture nicely may not fit the wall.
- Walking space. Trace the route from the door to the seating and the window. If you would have to squeeze past a table, the layout does not work.
- Light. Check whether the room looks brighter only because the AI added lamps or sunlight you do not have.
- Invented features. Watch for fireplaces, shelving, beams, or extra windows that were never there.
If something is wrong, regenerate with a more specific prompt rather than accepting a near miss.
Keep in mind what the image is: a concept. It does not give you measurements, product names, or a cost. Measure the room and check real product dimensions before you buy anything. The page on how the AI room designer works explains the steps from upload to download in more detail.
When to use a wall paint, flooring, or staging tool instead
A full redesign changes many things at once. That is useful when you are choosing a direction, and unhelpful when your question is narrow. If you only want to know whether sage green suits the living room, new furniture in the picture is a distraction.
Use a narrower tool when the decision is narrow:
- Paint only. The AI wall paint visualizer changes the wall colour and leaves the furniture, floor, and layout alone.
- Floor only. The AI flooring visualizer swaps the floor material, so you can compare oak, tile, or herringbone under your own furniture.
- An empty room. Virtual staging adds furniture to a vacant room without restyling the walls or floor, which is what a listing photo needs.
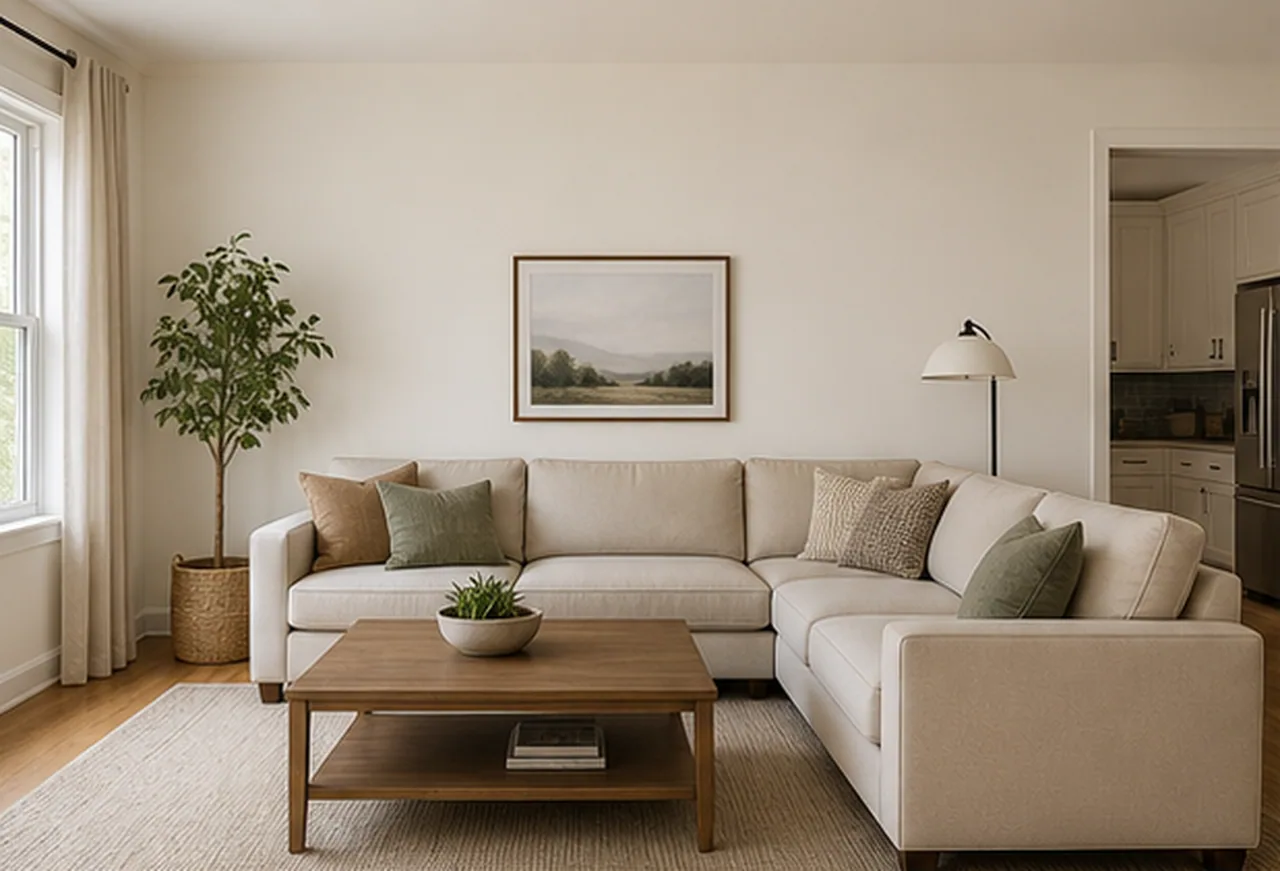 Before
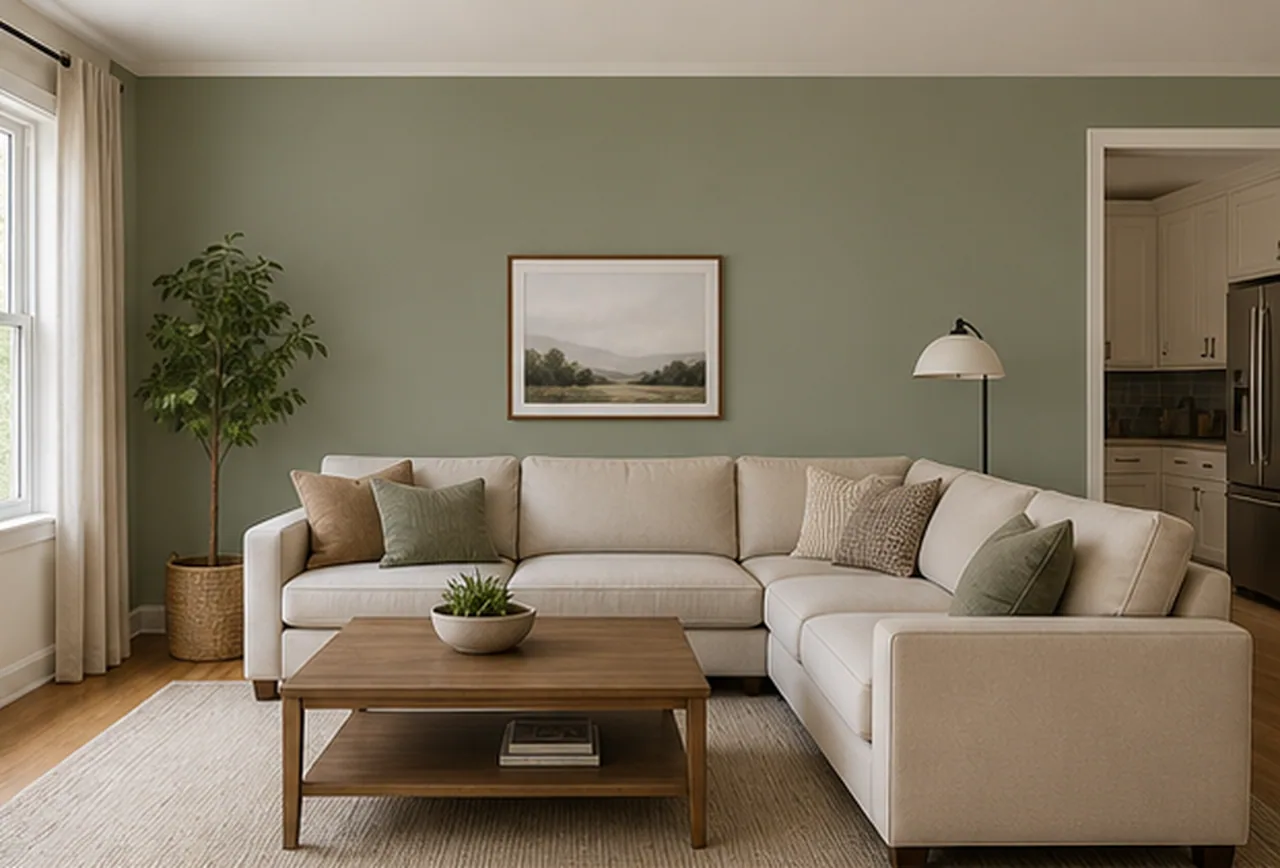 After
AfterA sensible order is to settle the overall direction with a full redesign first, then test single decisions, such as paint and flooring, one at a time. Each image then answers one question, and you can show it to a partner, landlord, or contractor without explaining which parts to ignore.
